To a Wild Rose
What a fun evening of creating with some beautiful ladies ~ I love my girls and love how friendships naturally happen around the table as we chat, laugh and create together ~ this is such a blessing for me to be apart of an amazing group of creative gals
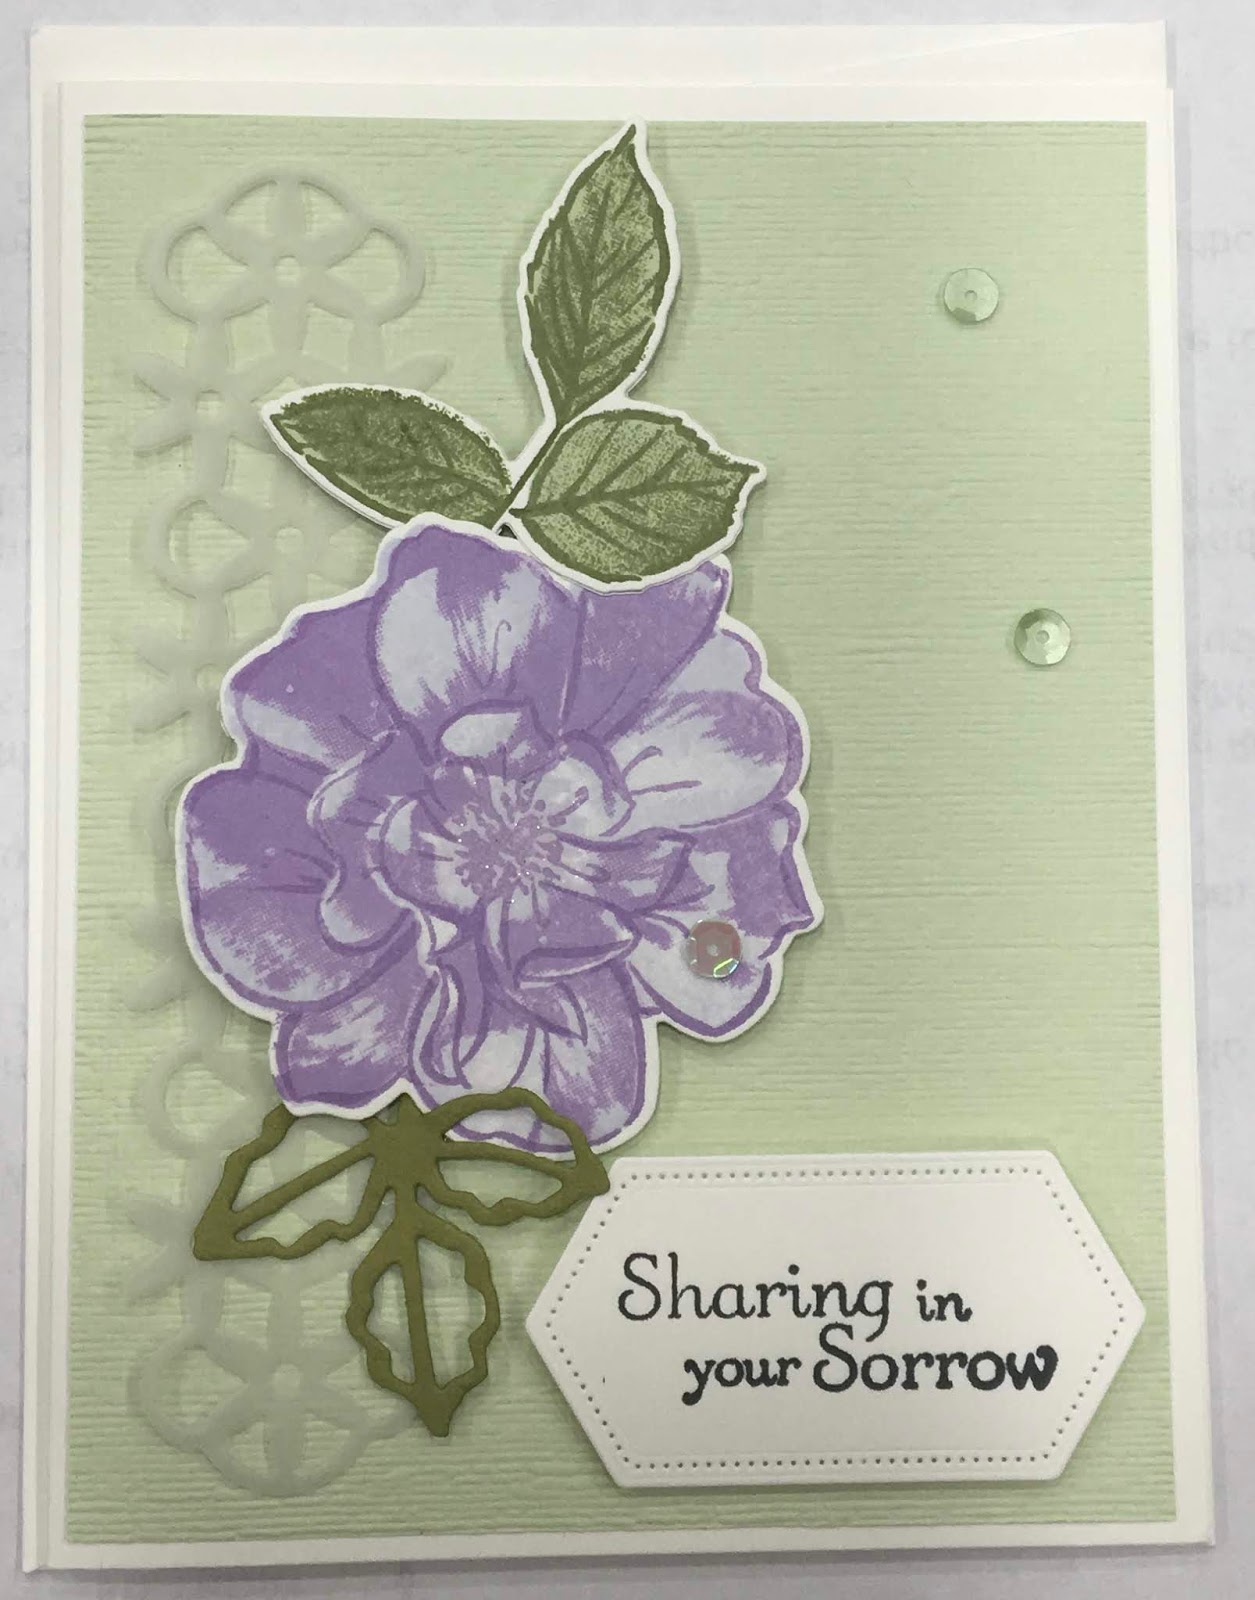
We got busy creating with the fabulous To a Wild Rose stamp set and this is what the girls all went home with last night ~ the sentiments on many of the cards are different, but this is a picture of two of my cards ~ and very sadly, I need the sympathy card for today ~ glad I had this one created as I don't enjoy creating a sympathy card when it's needed ~ I alway try to have a stash on hand ~
sorry about the terrible picture, but I didn't have time to take a better shot of this as I'm not running out the door

~ Same card, different sentiment ~ and here are the instructions that I created for class, all the girls get an instruction sheet and they tuck them into a binder once they get home!
Layer 1 ~ Soft Seafoam ~ 5 1/4” x 4” ~ run through Embossing Machine using Subtle EF ~ adhere to Card Base using TomBow (Liquid Glue)
Layer 2 ~ Vellum ~ 5” x 1 1/4” ~ run through Cutting Machine using Border Die from Wild Rose Die ~ adhere to Card Base using Adhesive Sheet
Layer 3 ~ Whisper White ~ 3” x 3” stamp large ‘open image’ flower from To A Wild Rose using Highland Heather, stamp fullest flower image using Purple Posy, stamp last flower using Highland Heather, cut out using Wild Rose Dies ~ I painted the stamens with Wink of Stella ~ adhere to card using Dimensionals
Layer 4 ~ Whisper White ~ 2 1/2” x 2 1/2” stamp ‘open image’ leaves from To A Wild Rose using Old Olive, stamp fullest leaves image using Soft Seafoam, stamp last flower using Old Olive, cut out using Wild Rose Dies ~ adhere to card using Dimensionals
Layer 5~ Old Olive scrap ~ 1 1/2” x 2” cut open leaf from Wild Rose Dies ~ adhere to card using Tombow
Layer 6 ~ Whisper White ~ 2 1/2” x 1” stamp sentiment on a piece of scrap and adhere where desired using Dimensionals ~ adhere Adhesive Sequins where desired!!!
I'm starting a new class for all my Paper Pumpkin subscribers and those that would like to join in the fun ~ drop me a line or head over to my On-Line store and grab yours, be sure to bring that along to class and join in the fun!


thanks so much for popping by today ~ have a blessed day ~
Please pop in on http://www.chezmoicreations2.blogspot.com ...you'll find a link to some knitting that I've created. Drop me a line if you have any questions!


Comments
Post a Comment
Thank you for taking the time in leaving me a comment! I hope I have inspired you ~ I do take the time to read each comment and value your words of encouragement! Have a great day and happy creating!